Monday, May 15, 2023

Marsha Reports

Greetings!  Marsha here.  Let's talk about construction!  As I was out and about today, I swung by the new location of JK Quilts in Meridian.  Their new building is under construction and due to be completed by the end of July.  They plan on moving to the new location in August. 

Look at this!  The roof is on and the outside walls up.  I was so impressed, I had to stop by their current location and buy some Lori Holt fabrics, which happen to be on sale.  What an exciting day in Meridian! Time to construct some quilts!

Sunday, April 30, 2023

Tumblers Quilt

Astrid completed her wedge quilt, which may be called a tumblers quilt.  We don't know.  They look like wedges to me.  Kirstin's cousin said they looked like lava lamps.  With the multitude of fabrics she used, it looks pretty awesome, no matter what it is called.  If you know your multiplications, then you can multiply the number of blocks across by the number of blocks down and determine how many blocks are in Astrid's quilt.  


Although Astrid cut a lot of those blocks out quickly, she slowed down in the process to get everything just right.  She is looking to put it in a quilt show this coming fall.  She carefully stitched-in-the-ditch, using her walking foot, so her stitching is more straight than not, and trying to avoid starts and stops in the body of the quilt.  She did have a few problems with not keeping it in the ditch, so she had to leave long threads on and rip out the bad part, then tied a knot in the thread, then thread it on a needle, so she could pull it all under the top fabric (make it not be seen).  What a pain!  It is so much more fun to just do it without thinking about it being perfect for a show.  This is Marsha signing off!

Saturday, April 1, 2023

Wedge Quilt Under Way

No sooner had Astrid and I finished up that last quilt, Astrid has a whole other one up on the design wall.  When exactly did she cut all those wedges, anyway?  She won an acrylic wedge-shaped ruler at a quilting retreat last year, and now she is giving it the work out.

She sewed them together in sets of two then arranged them on our amazing black design wall.  I think the bottom couple of rows are actually sewed to each other, but the top mass is not.  She is still deciding if each row needs two more wedge shapes.  I guess I will just make a strip quilt, so I won't need the design wall.  Over and out, Marsha.

Tuesday, March 28, 2023

Ta-da! Astrid and I Completed a Quilt!

Our collaboration quilt is completed!  Marsha here.  It looks great and we are happy with it.  If you compare the finished quilt with the photos in the previous post you may notice, or not, that one strip of fabric in the center block has been changed.  We ripped it out and replaced it with a strip not as blue/green as all the other ones surrounding it.  Astrid may be a little bit anal.  

We have no idea what this pattern is called.  We think it is a modified courthouse steps quilt.  We hope you like it as much as we do.

If you have not tried sewing different pieces of fabrics together to see how they look, you should try it.  It could be a pillow cover or a placemat.  It does not have to be a quilt.  See you next time!

Wednesday, March 8, 2023

We Lost Something . . . Where Did It Go?

How did that happen?  We lost the month of February of 2023!!  We will never see it again.  Things are just happening, then the next thing we know it is March, and we had not managed to post anything in February!  I guess after helping Jane with her amazing tutorial, we all just got back to our own stuff.  We all apologize.  Marsha and I (Astrid) are actually doing some collaborative quilting (that means working together).  Below are photos of it in the design stage, which is where we are today.

These blocks are rectangular. They start out like courthouse steps, then the final round is sewn in the off-set frames fashion.  We have been thinking we are making the blocks too big, but too late now.  
They are on our design wall, which we made out of foam core board that we covered in black flannel.  The blocks really pop on that black.  We have four more blocks to sew together, then we can sew the blocks to each other, etc.  Our goal is to get it all completed by the end of March.  I am telling Marsha, we should probably make another one of these with wonky blocks and some solid black backgroundishness.

Monday, January 23, 2023

Jane's January Tutorial

It is January again!  I am Jane, and I am going to show you how to make a "Quilt-As-You-Go" quilt using strips of fabric.  It is a quick and easy quilt.  As I piece the strips together, I will be quilting the quilt at the very same time.  I think this really saves on thread!

The first step in making a quilt, is to decide on numerous things.  You have to stop and think about what fabrics you have, and which ones you want to put into your creation.  I thought I knew which ones I wanted, but after I sewed the first three strips on, I changed my mind and had to do a little more auditioning before I could continue.  Enough about that now.
First, I decided how large I wanted my quilt to be.  Then, I cut out the backing for my quilt.  Yep, you do this first.  Then cut your batting to be just a little bit smaller than the backing.
Place your backing fabric face-down on your work surface.  Place the batting on top of the wrong-side of the backing fabric.  Either pin or use spray basting adhesive to secure the batting to the backing fabric.  I use spray basting adhesive.  Safety pins work just fine.
I know I want to use that amazing multi-colored fabric in this quilt, so I will choose other fabrics to go with it using the colors that are in my top choice fabric. 
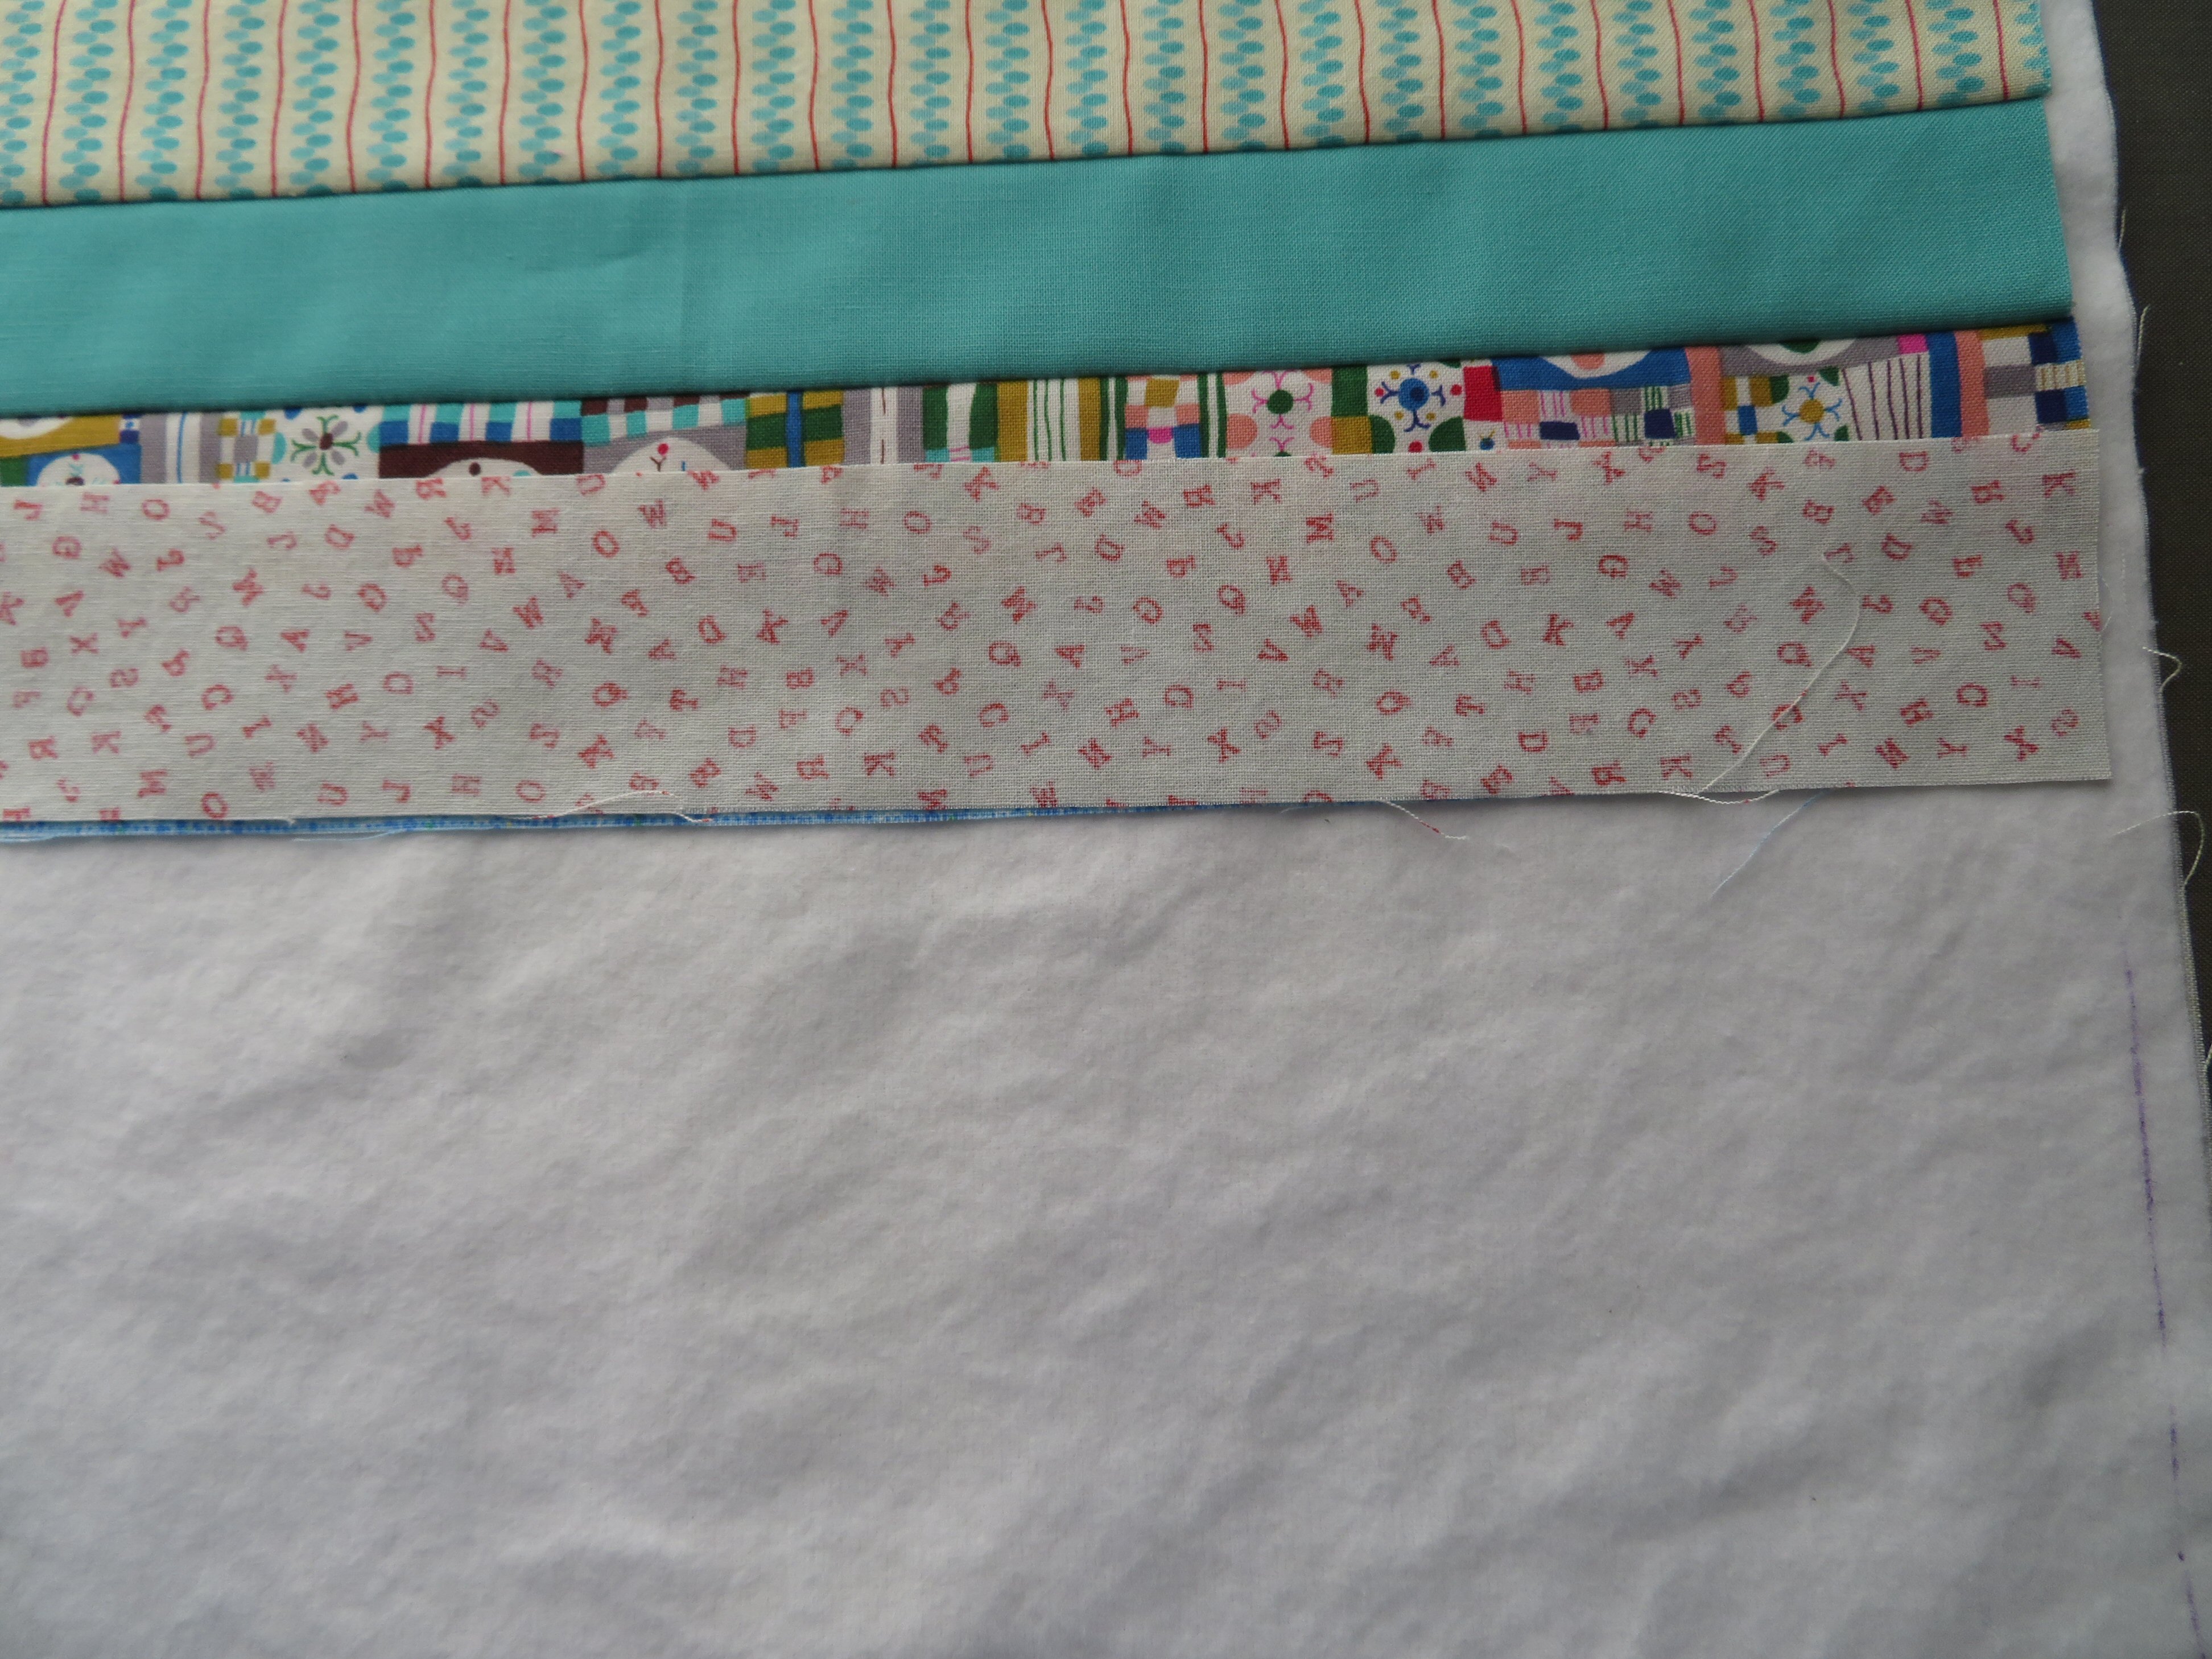
Since you know how wide your batting is, you can cut some strips to audition on your laid-out backing/batting.  Just lay the strips on there and rearrange them how you like.  Remember, a quarter of an inch on either side of the strips will be sewed into the seam allowance, so overlap your strips, a little, so you can kind of gauge how many you will need.
This is what I thought I liked, but then I noticed there is no yellow in my top choice fabric.  It has a gold, but no yellow.  I also decided it did not have enough pop in it, so I tried some of the hot pink that is in my top choice fabric.
Hmmmmm.
I rummaged around and found some gold tone fabric and decided some red would give it the pop, along with more strips of my top choice fabric.  Instead of only three strips, I put in five strips of my multi-colored fabric.  The bottom row strip, I decided to piece, using the cut-off ends of some of the other fabric strips.
Time for constructing this amazing creation:
Using a Sharpie marker and your long ruler draw, a line down the side of your batting.  Place it parallel to the left edge, about a half-inch from the edge.  You will line-up all your strips on this line.  If you do not draw a line, you could end up with your strips straggling back and forth, which is okay, if you want to chop a lot of your quilt sides off, when you square it up at the end.  I don't want my quilt to be any smaller than I have already decided on.  Use a Sharpie, because the Friction pen's marks disappear when you press the strips outward.  
Lay all your strips, in order, off to the side of your backing/batting part.  Chose the two strips in center of your layout, because you are starting in the center and working in one direction, then working in the other direction. Shown above are my two center strips.
Line up with the line. Place the one on top of the other, right sides together.  Pin them to secure them, along the lower edge.  Tip:  I have always pinned to make sure the fabrics do not shift as I sew them together.  Yes, I run over my pins, and it has not been a problem.  I was taught to do it that way in school.  See the next photo to see where the seam was sewn.
You sew through both fabric strips, the batting, and the backing, all at once.
Press the lower strip away from the upper strip (the colorful one away from the blue one).  Then lay your next strip on top of the colorful one and sew it down.

Continue placing strips on, sewing them down, and pressing them away from the other strips.


At this point, the last strip on this end has been sewn down and pressed.  Rotate your project around so the marked line is now on the right-hand side as you look at your project.  
This is the half-way finished mark!  Take the next strip and lay it on the one in the center and continue sewing, pressing, and pinning strips on. 
Keep going!
The last strip is sewed on.  Notice it is wider than the others?  I did that on purpose, so it will reach as far as I want it to, then I can trim the excess off.  Now, it gets pressed out, just like the rest.

The top is trimmed off straight.  Square up the other three sides of your quilt.  
I have squared up my quilt.  It has nice straight edges on all four sides.  It is sewn together and is all quilted!
Go ahead and put a seam on the edge of the top and bottom strips, to keep them from flopping about.  This will make it nicer when you put on the binding. 
This is the back of the quilt.  You can see the quilting here.  Because you press each strip over, after you sewed the seams, the quilting is not seen on the front of the quilt.  It is like magic!
Now all you have to do is make some binding strips and sew on the binding, and your quilt is finished.
Ta-Da!
                            Quilt-as-you-go Variations

I made a quilt-as-you-go quilt last July.  I placed all the strips on an angle.  I still started in the center and worked toward the bottom, then worked toward the top to complete it.  I used strips of different widths, that had more than one fabric pieced to make each strip.  I made long strips and sewed them down, then trimmed them off.
I love this quilt.  Click on the photo and it will enlarge, so you can see the details and fabrics better.
My friend, C, made this quilt-as-you-go quilt.  She cut her strips so that they left about four inches on the left and right edges.  She sewed the strips in the middle section, just like I showed you how.  Then she made long strips for each side, made from pieced half-square triangles.  She sewed the side strips on and pressed them out, just the same.  Looking at it, you would never guess it was pieced/quilted the same way.
I hope you learned a lot from this tutorial.  Please, leave me a comment!

Monday, December 26, 2022

A Christmas Quilt

We sincerely hope you had an enjoyable Christmas.  We had a little party on Christmas eve day.  Jane brought a Christmas quilt to show us all.  She just made it recently, and it is really more of a winter quilt.  It has lots of holly and snowmen.

Then we posed for some photos, made cookies and candy, and played Uno.

L to R:  Jane, Kirsten, Marsha, Astrid, and Willa

So, get out your needle and thread (or a sewing machine) and make something fabulous; like a placemat, apron, or zippy bag.  Our friend, Mary, learns how to make so many cool things by watching YouTube tutorials.  The nice thing about those is you can rewind them and watch them over and over.   Meanwhile, in January, Jane will be doing her annual tutorial, that you can refer to over and over, also!  If you have any ideas of what you would like Jane to teach, in January, please leave a comment.  Soon!  As she has to have time to prepare.