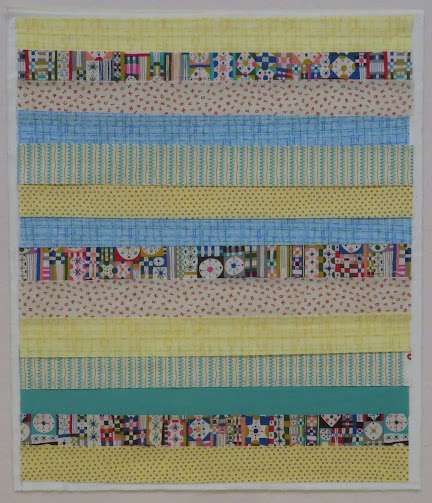
It is January again! I am Jane, and I am going to show you how to make a "Quilt-As-You-Go" quilt using strips of fabric. It is a quick and easy quilt. As I piece the strips together, I will be quilting the quilt at the very same time. I think this really saves on thread!
The first step in making a quilt, is to decide on numerous things. You have to stop and think about what fabrics you have, and which ones you want to put into your creation. I thought I knew which ones I wanted, but after I sewed the first three strips on, I changed my mind and had to do a little more auditioning before I could continue. Enough about that now.First, I decided how large I wanted my quilt to be. Then, I cut out the backing for my quilt. Yep, you do this first. Then cut your batting to be just a little bit smaller than the backing.Place your backing fabric face-down on your work surface. Place the batting on top of the wrong-side of the backing fabric. Either pin or use spray basting adhesive to secure the batting to the backing fabric. I use spray basting adhesive. Safety pins work just fine.I know I want to use that amazing multi-colored fabric in this quilt, so I will choose other fabrics to go with it using the colors that are in my top choice fabric.Since you know how wide your batting is, you can cut some strips to audition on your laid-out backing/batting. Just lay the strips on there and rearrange them how you like. Remember, a quarter of an inch on either side of the strips will be sewed into the seam allowance, so overlap your strips, a little, so you can kind of gauge how many you will need.This is what I thought I liked, but then I noticed there is no yellow in my top choice fabric. It has a gold, but no yellow. I also decided it did not have enough pop in it, so I tried some of the hot pink that is in my top choice fabric.Hmmmmm.I rummaged around and found some gold tone fabric and decided some red would give it the pop, along with more strips of my top choice fabric. Instead of only three strips, I put in five strips of my multi-colored fabric. The bottom row strip, I decided to piece, using the cut-off ends of some of the other fabric strips.
Time for constructing this amazing creation:
Using a Sharpie marker and your long ruler draw, a line down the side of your batting. Place it parallel to the left edge, about a half-inch from the edge. You will line-up all your strips on this line. If you do not draw a line, you could end up with your strips straggling back and forth, which is okay, if you want to chop a lot of your quilt sides off, when you square it up at the end. I don't want my quilt to be any smaller than I have already decided on. Use a Sharpie, because the Friction pen's marks disappear when you press the strips outward.
Lay all your strips, in order, off to the side of your backing/batting part. Chose the two strips in center of your layout, because you are starting in the center and working in one direction, then working in the other direction. Shown above are my two center strips.
Line up with the line. Place the one on top of the other, right sides together. Pin them to secure them, along the lower edge. Tip: I have always pinned to make sure the fabrics do not shift as I sew them together. Yes, I run over my pins, and it has not been a problem. I was taught to do it that way in school. See the next photo to see where the seam was sewn.You sew through both fabric strips, the batting, and the backing, all at once.Press the lower strip away from the upper strip (the colorful one away from the blue one). Then lay your next strip on top of the colorful one and sew it down.Continue placing strips on, sewing them down, and pressing them away from the other strips.
The top is trimmed off straight. Square up the other three sides of your quilt. I have squared up my quilt. It has nice straight edges on all four sides. It is sewn together and is all quilted!
Go ahead and put a seam on the edge of the top and bottom strips, to keep them from flopping about. This will make it nicer when you put on the binding. This is the back of the quilt. You can see the quilting here. Because you press each strip over, after you sewed the seams, the quilting is not seen on the front of the quilt. It is like magic!
Now all you have to do is make some binding strips and sew on the binding, and your quilt is finished.Ta-Da!
Quilt-as-you-go Variations
I made a quilt-as-you-go quilt last July. I placed all the strips on an angle. I still started in the center and worked toward the bottom, then worked toward the top to complete it. I used strips of different widths, that had more than one fabric pieced to make each strip. I made long strips and sewed them down, then trimmed them off.I love this quilt. Click on the photo and it will enlarge, so you can see the details and fabrics better.My friend, C, made this quilt-as-you-go quilt. She cut her strips so that they left about four inches on the left and right edges. She sewed the strips in the middle section, just like I showed you how. Then she made long strips for each side, made from pieced half-square triangles. She sewed the side strips on and pressed them out, just the same. Looking at it, you would never guess it was pieced/quilted the same way.
I hope you learned a lot from this tutorial. Please, leave me a comment!


