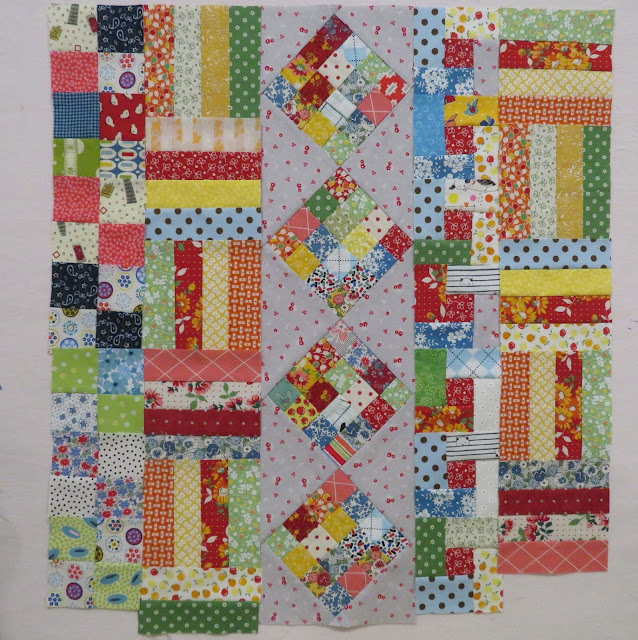
Gosh! I am cutting it close. This third quilt, although made completely of blocks already made, got a little out of control. Remember those extra 16-patch blocks? I decided to start with them, in a row down the center. I may make another quilt with only three in the row down the center. I used four in this one. So, get those orphan blocks out! My favorite quilters, Freddy Moran and Gwen Marston call it the "Parts Department". Go to your Part Dept. and find some of those four patches and whatever else you have and put them up on the design wall with your 16-patch blocks.
Here are my 16-patch blocks on point, on my design wall. I am making a vertical row quilt. I have chosen a gray with little red flowers as the background fabric. I will also be using some left over rail fence blocks, some four-patch blocks, and some of my off-set frames blocks that look like log cabins. You can use whatever you have that kinda goes with the color scheme of the majority of your blocks. This quilt may seem to take a little longer, due to you are designing as you go. I love designing as I go!
Look back at Session 1, to review how to piece these sixteen-patch blocks on point. I like having a little extra background sticking out, so I can be flexible with my planning. It turns out four of these on-point is fairly tall, so I will be cutting the top and bottom down a bit. You can see I have plenty underneath the bottom block.
I have put a bunch of blocks, in vertical rows, on the design wall on both sides of my on-point blocks. I see I will have some not-coming-out-exactly-even rows. The great thing about this design is it's thirties and forty-ishness. You can use what I call cheaty blocks to make up the extra length in the rows. Or you can make a couple of the blocks in the rows, a little taller (longer), but you will have to make fresh blocks to add in for that.
I have rearranged my rows to see how I like it this way, but it still seams a bit busy. I think I will cut a couple solid strips of the gray background to break up the busyness.
Okay, I have sewed the blocks in the two rows on the right together. You can see that they have shrunk up quite a bit. I think I can add two more to the narrower row and maybe a three-strip section to the bottom of the rail fences row. I know I will need to do the same on the left side. I have not sewed them together yet.
I have cut a couple of gray strips to add in, and have rearranged my rows again. I think this is the most pleasing design. I did sew the cheaty three-strip section on the bottom of the left rail fence row. Whatever is left hanging off the bottom, I will trim off when I square up the quilt top.
This view shows it all sewed together with the raggedy bottom edge. Now it is time to square this puppy up! I laid it on my cutting board and put the top edge on my right. I squared up the top edge first, then keeping the top lined up straight, I cut the bottom straight. I did the same to both sides.
Here it is all squared up! The full view of the finished quilt top. Kirsten took the photos. They are a little from the side to get the best light. I think the colors of the fabrics came out well that way.
I am showing off my fabulous new Sixteen Patch Vertical Row Quilt.
It is a little larger than the others, but it will fit better on my big bed!
Thank you for checking out my January tutorials!


No comments:
Post a Comment